Minibike Mullahs

A blog about minibikes, kids, minibike repairs, tuning, repairs, cool stuff for minis and where to get it, and repairs.

Thursday, June 22, 2006

Oil Change for the Cool Foxster


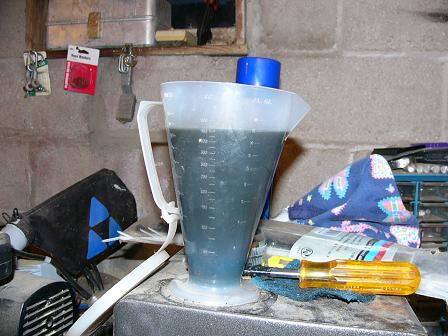
It had three hours of run time on the motor so I decided to change out what ever was provided as lubricant from the factor. My first task was to drain it into a pan and make note of any metal in the oil. This is what you are suppose to be looking at in the green bowl. There was a modest amount of shine from very small particles suspended in the oil. This looked rather typical from other small motor oil changes. Actually I expected a substantial amount of metal because of the gears going through their break in time, so I was pleasantly surprised to see the small amount I did. So far so good, until I measured how much came out, 400cc. That's a fine number but my less than substantial owners manual said the capacity was 800cc's. So I added 400cc's of pencil Platinum 5w-30w synthetic oil back to it. Slowly I add more until the dipstick was measuring full. This worked out to be 600cc total. A little short but I don't want to overfill it. Next, time to see how it runs against the KX 60.

Wednesday, June 07, 2006

N-Style Fox Graphics


Graphics?
Sure, I know what your saying, why does an old man care about graphics on a play bike. Hey I remember how important bike fashion was, and face it, it may say Coolster but the factory stickers are definitely not cool. With that in mind I perused the on-line Chaparral catalog and after much studying body panels I determined that CRF 50 body work was what I had on the Coolster. So I decided on a set of N-Style Motocross Fox blue graphics. I liked the retro referenced Fox face, and the gray, blue, and white swaths looked hip, or whatever jargon the kids are using these days.
A friend let me know that a special spray on application was available to make the installation easier by allowing the graphics to be moved around on the bodywork before it finally dries. This would be much easier than the slow process I used of pulling a little backing off and deliberatly applying a small section at a time, checking my alignment as I go. Everything went well enough except for the right side panel that goes over the exhaust. I should be able to razor the bubbles and re-set that area of the sticker. I also finally mounted the front plate, I had to use a tie rap to get it done. Here's how it looks now.

New Knobbies for the Coolster


The new knobbie tires came in a pair of Bridgestone Motocross M402's. The description in the Chaparral catalog says that they are suited for intermediate terrain, which suited me as about right for serious yard riding and casual track tracing. First thing up was to take off the rear tire. I had to HAMMER it off. It was really squeezed in the swing arm, I’ll come back to this. For now I needed to pull the brake disc screws, apply some "blue" medium strength thread locker and retorque. Next I had to remove the original tires. Do yourself a favor, if you plan on doing the replacement yourself, get a set of those Rim Protectors that are sold in most metric motorcycle catalogs. The anodizing on aluminum rims is a soft and easily scratches. I thought I was smart enough to figure something else to use, and although I ended up using the lips off an old plastic waste basket and taped my irons, it still put a couple of small marks on the rims. The right tool is so important. Putting the new tire on was easier than taking the old one off though and I seemed on track until I tried to shoe horn the tire, axle spacers, and disk brakes back into that aforementioned "son of monkey swing arm" I realized that there was no way I was going to make it go back in the way it came out. This next part is not recommended but I did it anyway. I sized up the spacers and it appeared that the swing arm to brake spacer was larger than needed due to the gap it was causing between the brake mounting plate. Some of us are lucky enough to have access to a hobby lathe, and against better judgment I machined off 0.25" off of this first spacer. This seemed to be enough, the whole tire assembly then fit snug but didn’t need the swing arm spread to make it happen. Also, when I checked the swing arm mounting bolt for the rear shock, I noticed some rust, so a liberal application of white lithium spray grease to this area should protect and lubricate (that's what I'm pointing to in the picture).
My test riders says that it is a definate improvement over the stock, turf friendly tires. Myself, I never really cared for the lawn, so let it have it.

Loose Bolts

RATS!
Don’t, I repeat don’t, let your break in time go past 1 hour of run time before rechecking all your fasteners. I thought I could wait until the first tank of gas was done before I rechecked. WRONG! After 3 hours of run time I found three of the 4 Allen bolts on the rear sprocket loose and this.
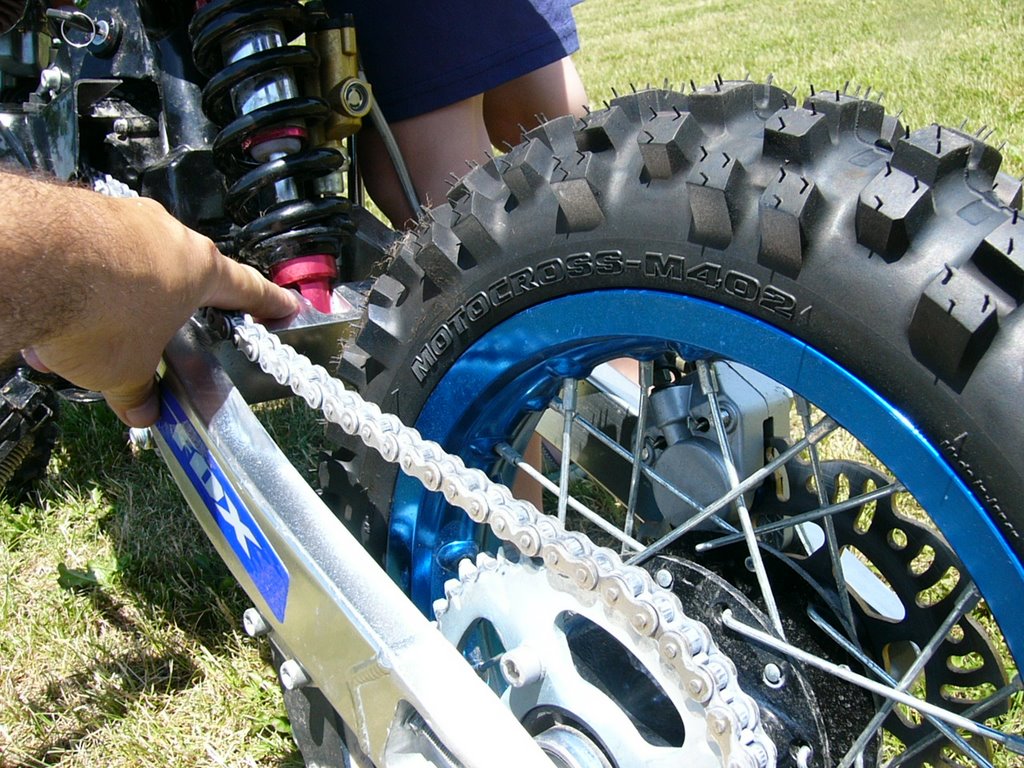
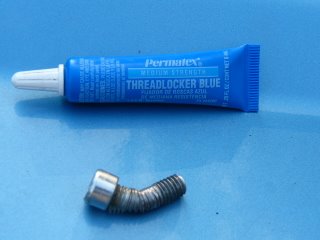
The only indication was a slight squeaking coming from the back end, it apparently backed out and contacted the swing arm. New stainless M8 bolts and lock washers from the hardware store are now installed along with plenty of blue thread locker. If I had it to do all over again I would remove all the bolts first, clean with a degreaser like contact cleaner and loctite all fasteners with the blue stuff. I wouldn’t recommend the high strength red loctite, life’s tough enough, you would need to heat up your bolts to reliable remove them with the high strength stuff.